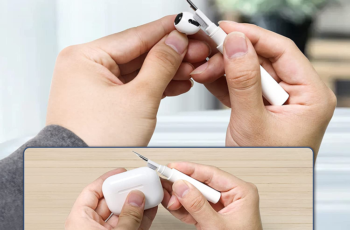
Your ability to properly care for and maintain your headphones will have a significant impact on the overall quality of the music you hear through them. Many different sets of headphones have pads that are seldom ever or never cleaned. Because of this, there is the potential for a great deal of trouble.
Proper Headphone and Ear Pad Maintenance: Why It’s Crucial
There are a number of benefits to preserving your headphones’ quality. whether you’re wondering whether what you’re doing right now is worthwhile, think about the benefits listed below.
- Save money – If you take better care of your headphones, you won’t have to buy replacement pads as often, which might end up saving you money.
- More soothing – Taking care of your headphones can increase their lifespan and keep them in great condition, both of which will make your listening experience more soothing over time.
- Improved hygiene — Cushions on headphones of all sizes—over-the-ear, in-ear, and full—collect sweat, dirt, and bacteria. Cleaning your headphones on a regular basis can lessen the risk of this occurring and will also keep them smelling nice.
There are several positive outcomes from maintaining your headphones. The ease of implementation is a great feature. No one needs to make any significant physical effort at any time. As a result, you’ll be able to get more time and value out of your headphones.
In this article, we will walk you through everything you need to know to clean the pads on your headphones and explain why it is so important that you do so. It is recommended that ear cushions and headphones be cleaned on a regular basis in order to prolong their usable life and maintain a high degree of sound quality. In order to thoroughly clean both components, do the following steps:
How to clean headphones ear pads
youtube source
When it comes to maintaining your over-the-ear or full-size headphones, it’s crucial to keep in mind the following.
Unplug the headphones:- Make sure the headphones are disconnected before you begin cleaning them to prevent accidental electrocution.
Remove the ear pads if possible: – If your headphones have detachable ear pads, take them off now. If yours are sticking, just pry them off. Because of this, we can clean more thoroughly.
Cleaning the ear pads: – To clean the ear cushions, just wipe them down with a soft, damp (not wet) cloth dipped in a mild soap or a solution of water and white vinegar (1 part vinegar to 3 parts water). Don’t wet them, since it would ruin the material. After washing, just wipe with a dry towel and let dry fully in the open air.
Cleaning the headphone speakers: – To clean the headphones’ speakers, try this: Using a dry, soft toothbrush, carefully brush the mesh region of the speakers to remove any dust or dirt. Don’t use too much force, since it might break the mesh.
Clean the headband and other parts: – The headphones’ headband and non-mesh components may be cleaned with a moist cloth dipped in a mild soap or a water-vinegar solution. Dry them completely after washing them. After everything has dried, reconnect the ear pads.
Weekly cleanings – If you don’t use headphones often, you don’t need to clean them every week. It has to be cleaned every seven uses. Get some warm soapy water and wet a soft washcloth. Reduce the volume. Cleaning the ear pads of your headphones. You may just wipe them down. They need to be dried before being used or stored.
Cleaning Your Over-Ear Headphones
youtube source
Unplug the headphones: As with over-the-ear types, in-ear headphones should never be used without first being unplugged.
Remove the ear tips if possible:– Most models of in-ear headphones have detachable silicone or foam ear tips, which should be removed if feasible. If so, take them out before you clean.
Clean the ear tips:– Ear tips may be cleaned by soaking them in a solution of mild soap and warm water, as is the case with silicone tips. Foam items should not be submerged in water; instead, a towel wet with water and mild soap should be used. You should wait till they are entirely dry to reconnect them.
Cleaning the headphone speakers:– To remove dust from the headphones’ mesh, use a soft, dry toothbrush to carefully scrub the area. Avoid hurting the earphone’s delicate drivers by never inserting anything into the nozzle.
Clean the rest of the earphones: – To clean the remainder of the headphones, use a towel soaked with mild soap and water solution to wipe off the headphones’ housing. It’s important to keep any cracks or holes dry.
Reassemble: – After everything is dried, put the ear tips back together.
Some Guidelines:
- To prevent scratching your headphones, just use a soft towel.
- Cleaning the headphones with anything too abrasive might scratch the coating and ruin them.
- Water should never be allowed to enter the headphones.
- If your headphones have been significantly stained, you should probably check the manufacturer’s instructions for the best way to clean them.
- If you clean your headphones on a regular basis, you can keep grime and oils from accumulating and eventually wearing down the material.
- If you want to keep from passing around germs and ear infections, don’t share your in-ear headphones.
- To avoid further water damage, make sure everything is dry before reassembling or using it again after cleaning.
- Care and maintenance instructions for individual materials should always be sought from the manufacturer.


